Lots of comprehensive art photography tutorials can be found online. So I won’t try to give a full rundown of all that goes into it. But I do want to share some tips that have made photographing paintings easier for me and have given me better results.
1. Use a Tripod and an Actual Camera
Holding your iPhone steady and straight just doesn’t always work. I’ve found that an actual camera mounted on a tripod makes a difference. It gives you a better chance at sharply-focused photos. Plus you can get your painting lined up just right in your viewfinder so that the edges are straight in your photograph.
Remember that image quality is about more than megapixels. The image processor in your digital camera is likely much better than the one in your phone, which means a lot less noise in your photos when viewed up close. My photos from my old 8 megapixel digital camera produced far higher image quality than my 12 megapixel iPhone camera.
Your phone camera will work fine in a pinch, especially when you’re just using it to share photos on social media. But for record keeping or print advertising, an actual digital camera is superior.
2. Use a Polarizing Filter
A polarizing filter on your camera lens will help you reduce glare, which ALWAYS seems to be an issue when photographing paintings.
3. Light Your Artwork Evenly
Do your best to evenly light your painting, whether you’re shooting inside or outside. If one side of your painting is lit up more than the other side, it will be noticeable in your photograph.
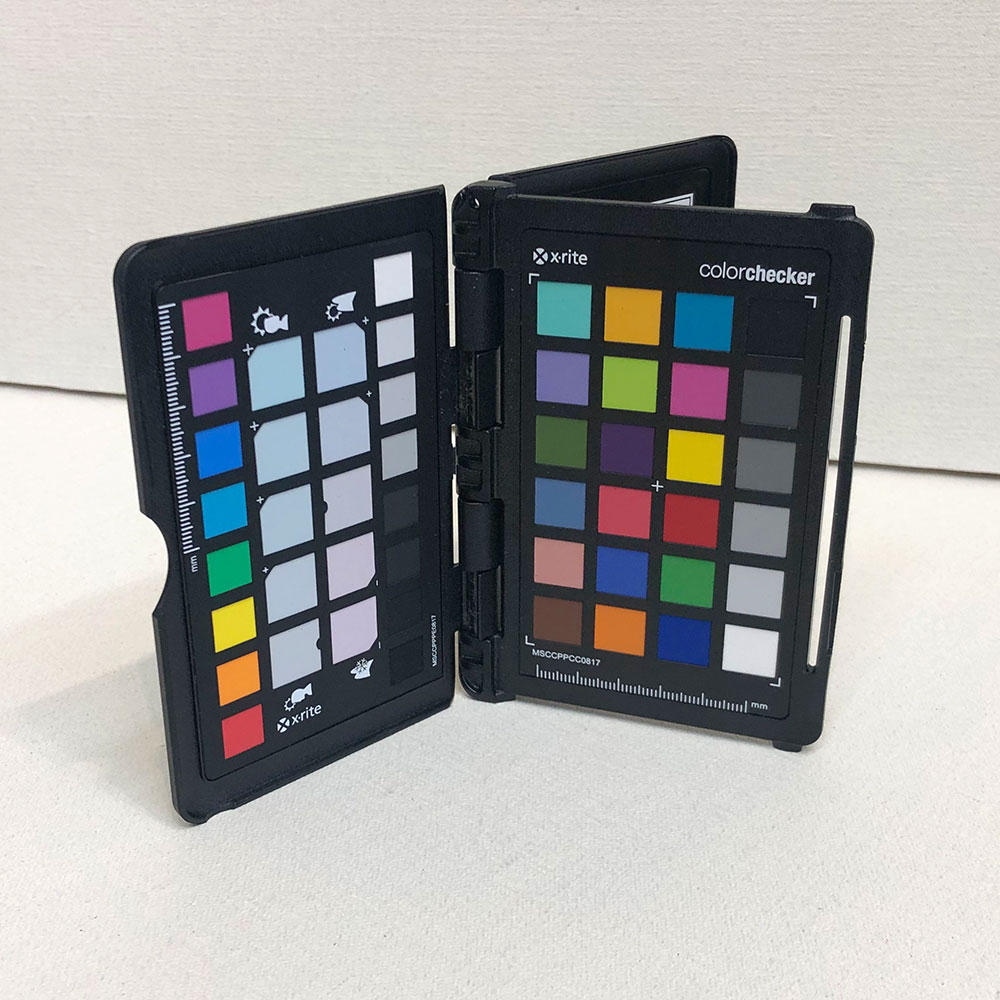
4. Try Color Checker Passport
I ordered one of these several months ago. It’s a color calibration tool that works with Adobe Camera Raw. It has helped me get the colors in my photos right in just a few steps.
Using the included computer software, you can create a color profile for your particular camera. Then Adobe Camera Raw will account for the way your specific camera sees color.
It’s also very helpful for adjusting the color in your photographs of your paintings. The color swatch card itself should be set up next to your painting and included in the frame with your painting. Once you’ve taken the photo, import it into Adobe Camera Raw. Then you can use the white point swatches on the card in your photo to make adjustments to the colors in your photo. This way you can account for the color temperature of your given light source and see how it affects the colors in your painting.
Once you’re pleased with the colors in your photo you can crop out the color swatch card. Your finished file then includes only your beautiful painting.
You can purchase Color Checker Passport at Amazon.com.
5. Use a Quality Camera and Lens
Around the time that I purchased the Color Checker Passport, I also upgraded my camera. I bought a Canon EOS R and a Canon RF 50mm F1.2 prime lens to go with it. It was time — I’d been using my old Canon EOS 30D for 12 years at least, along with its average-quality kit lens.
The upgrade meant that I went from 8 megapixels to 30 megapixels. But I think the new lens made an even bigger difference than the megapixel increase.
The lens is much sharper than my old lens — the image is sharp from edge to edge.
It also has a very low amount of geometric distortion so the edges of paintings remain straight along the borders of the photo frame.
Besides photographing paintings, it’s a great lens for photographing subjects to paint.
Very fast auto-focus performance
The wide f/1.2 aperture is fantastic in low light (unbelievable, actually!)
I doubt anyone reading this will go buy a new camera and lens, but it has made a big difference for me.
Write your awesome label here.
